The cover of my pillow is finally finished and now it adorns the living room sofa. For the first side I crochet 16 squares that I joined together on the go.
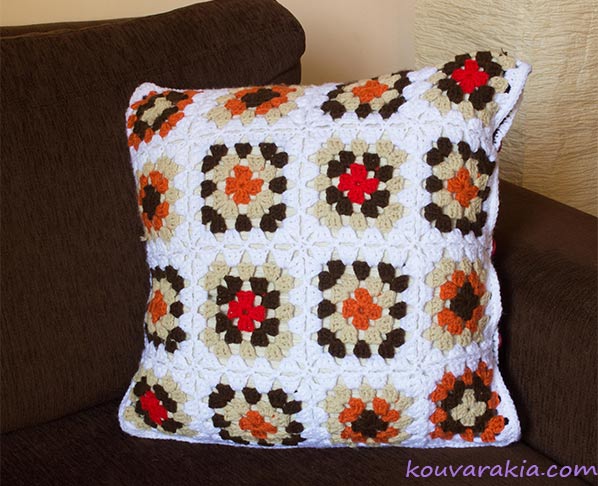
second side I crochet one big granny square and now I can change the design according to my mood.

I work single crochet on the three sides to join and I sew buttons on the forth.
Granny square
Abbreviations
ch: chain
dc: double crochet
sl st: slip stitch
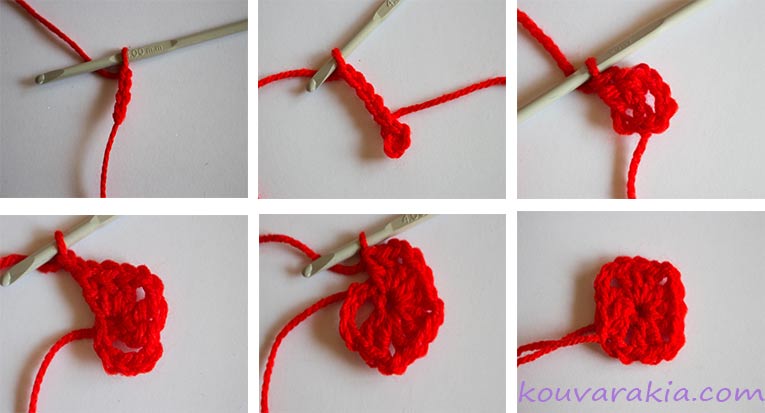
Ch 4. Join with a sl st in the first chain.
Round 1: Ch 5 (count as 1 dc and 2 ch), in the circle work *3 dc, ch 2* repeat 2 more times. 2 dc, Join with a sl st in the first dc (the 3rd ch).
Round 2: Attach new yarn in the ch space (or if you want to continue with the same colour work a sl st to reach the ch space) and ch 5 (count as 1 dc and 2 ch) and in the same space work 3 dc. *ch 1, in the next ch space work 3 dc, ch 2, 3 dc* 2 more times. ch1, 2 dc in the next ch space and join with a sl st in the first dc.
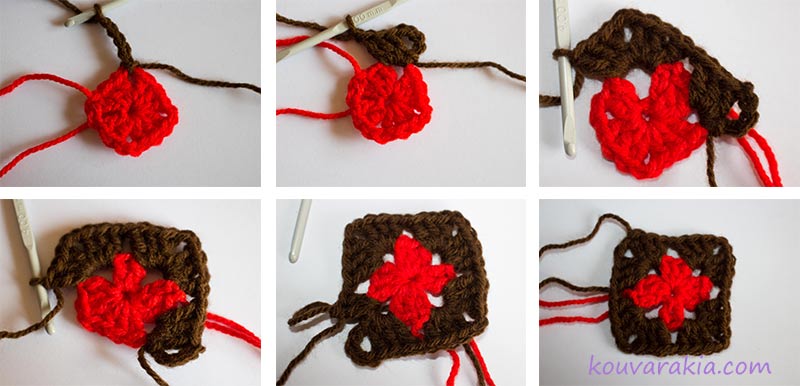
Attach new yarn in the ch space or if you want to continue with the same colour work a sl st to reach the ch space.
Round 3: Ch 5 (count as 1 dc and 2 ch), 3 dc in the ch space. *ch 1, in the next ch space work 3 dc and ch 1. In the corner ch space work 3 dc, ch 2, 3 dc* repeat 2 more times. Ch1, 2 dc in the next ch space and join with a sl st in the first dc.,

You can repeat in the same manner until you have one big granny square or you can make a few that you join to one large piece.
Happy crocheting